Lessons Learned Building an Aframe Pottery Studio
Building A Backyard A-Frame Pottery Studio: My Biggest DIY Adventure Yet
I've had an obsession with Tiny Homes since 2004, when I came across Jay Shafer's "The Small House Book." Since then, I've gone to workshops on tiny living, hand drawn different styles of tiny homes, even showed up at tiny home shows but I never tried to build one. The closet I've ever been was building out a van my husband and I lived in for a little while.
The opportunity presented itself to build my own creative space—a place where I could get my hands messy with clay, experiment with glazes, and just immerse myself in the slow, meditative rhythm of pottery or the occasional bit of macrame. So when I stumbled across these $30 transforming A-frame plans on Etsy (link), I knew I found the perfect design for my backyard pottery studio.
This post is all about my journey in building the studio, from why I chose this design to the unexpected challenges (and problem-solving moments) that came up along the way. I’ll also share what I would do differently next time, in hopes that it might help someone else taking on a similar project!
Why I Chose This A-Frame Design
I was drawn to this design for a few key reasons:
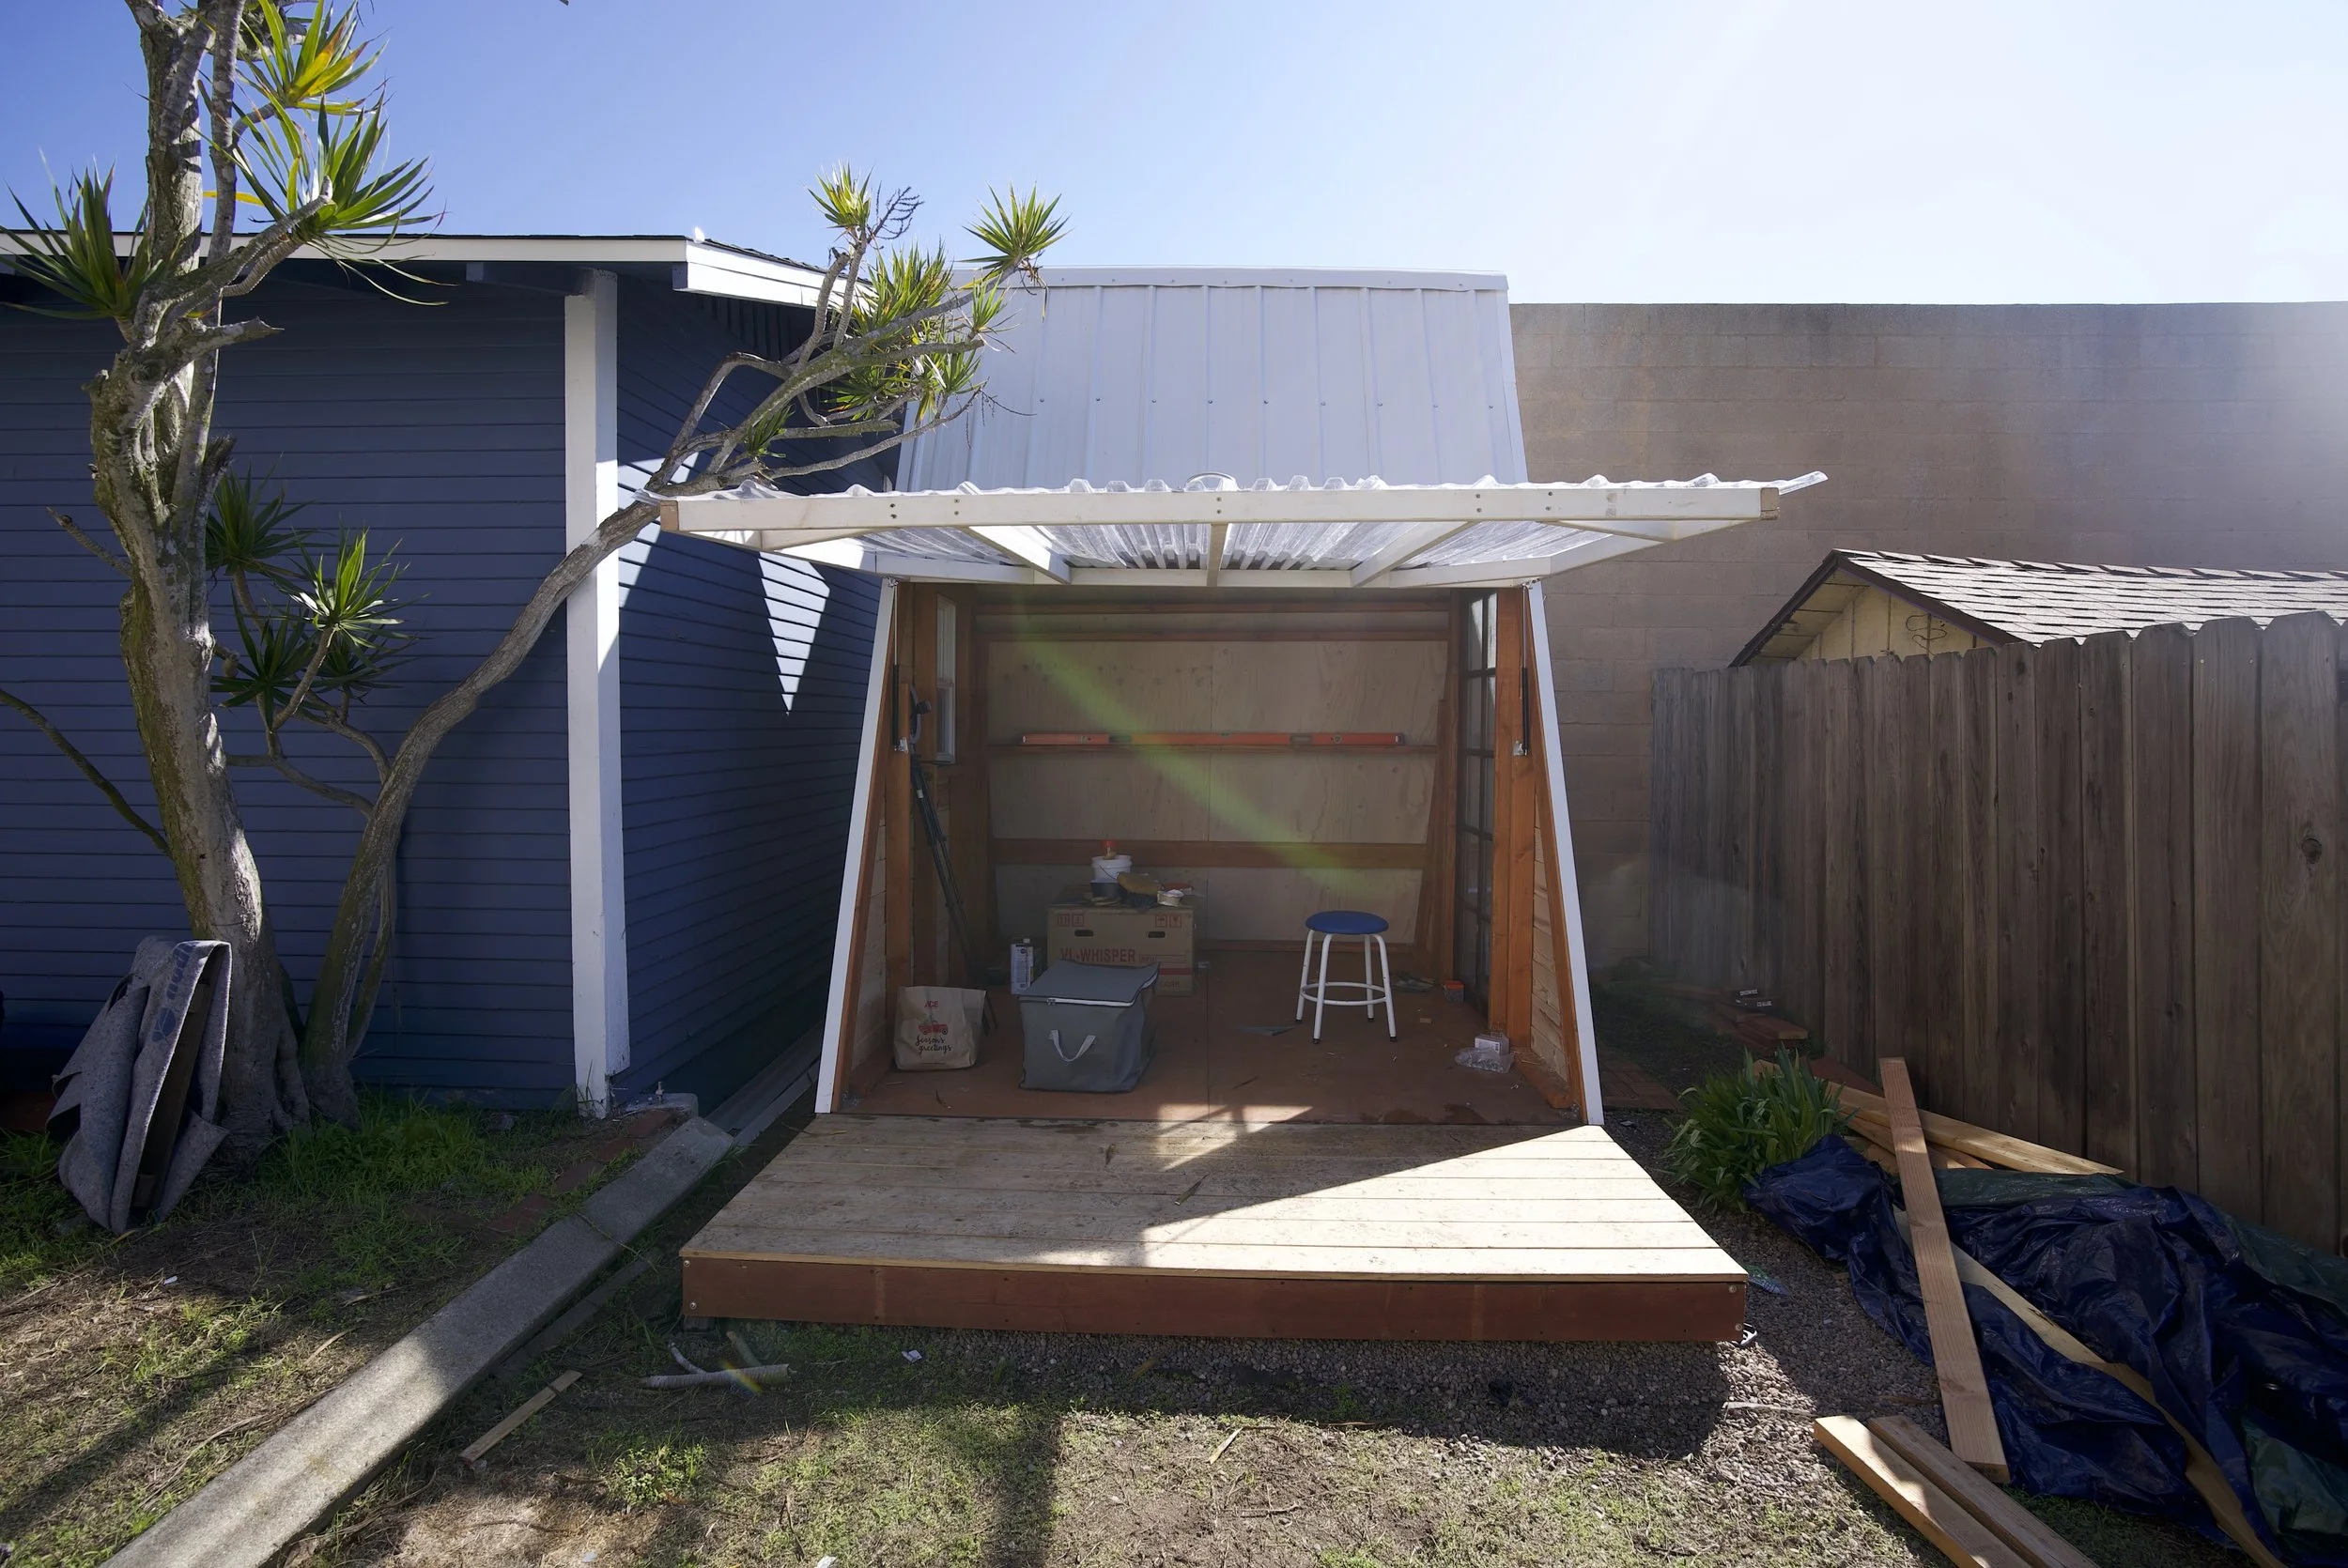
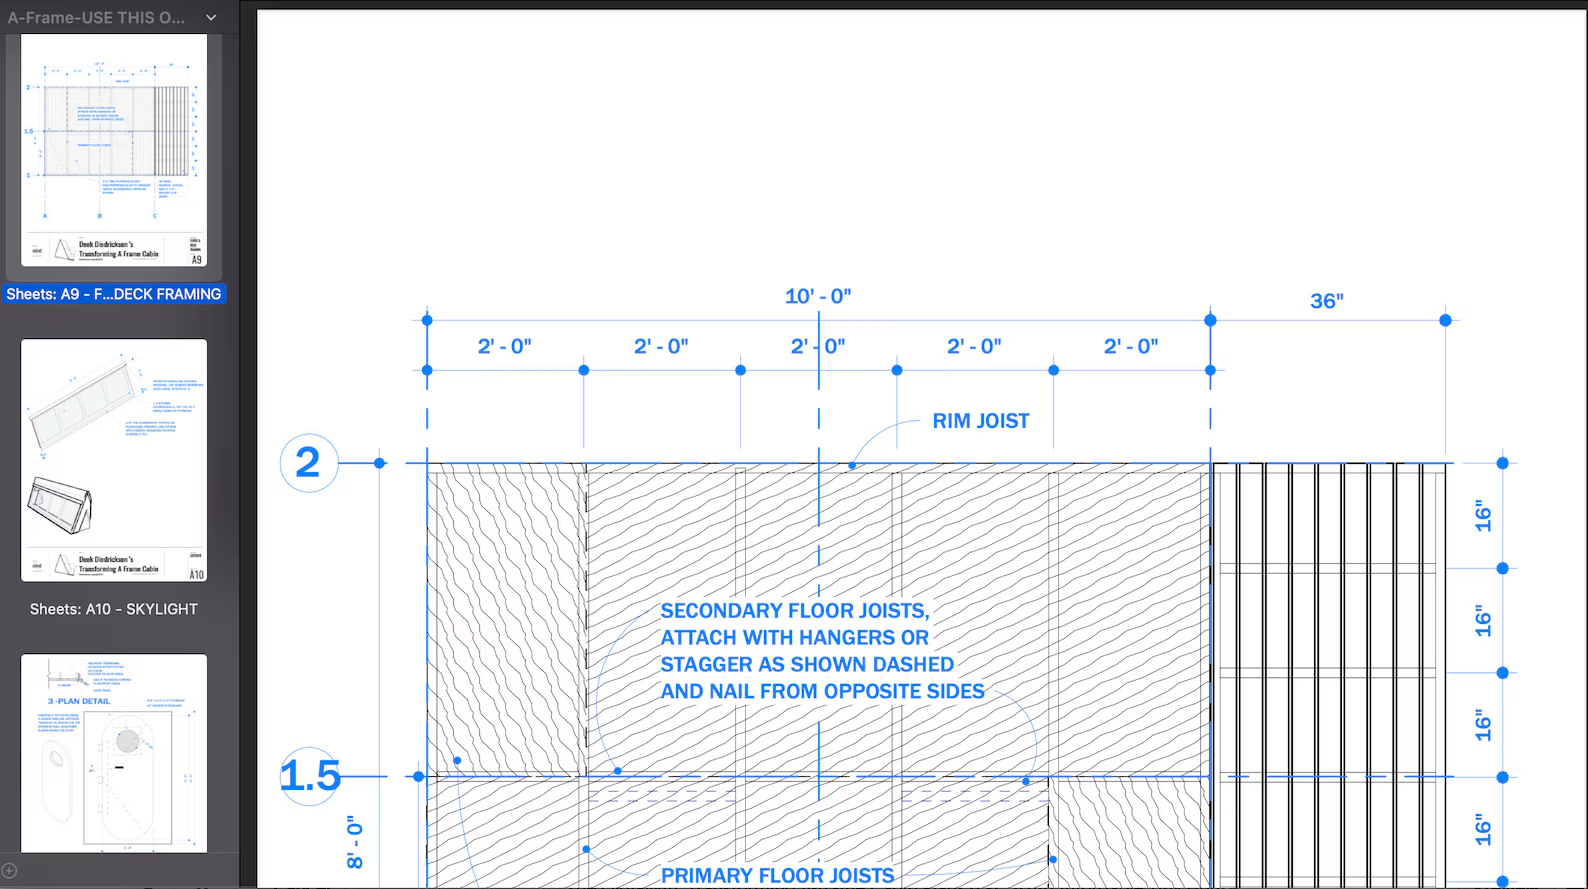
It’s compact but functional – Perfect for my backyard while still giving me enough space to work. The deck is 3ft wide and the Aframe itself is 8' x 10' and is a little over 11' tall with the deck.
It transforms! – The roof opens up, giving great ventilation, which is crucial when working with pottery materials. Plus, who doesn't like to feel like their outside all day.
DIY-friendly – I wanted to build it myself, and this seemed like an achievable yet rewarding challenge.
Getting Started: The Plans & Prep
When I purchased the plans, I realized right away they were pretty simple but a great starting point. They included clear measurements but zero step-by-step guidance.
Sourcing materials was an adventure in itself— The first day at Lowes I spent 4 hours asking questions about which screws to buy, what bits I needed and what foundation alternatives there were. But once I had everything, it was time to start building!
The Build Process: Triumphs and Challenges
The build itself had a mix of satisfying wins and hair-pulling frustrations, it took about two months from start to finish as a weekend builder but that included 3 out of town holidays and a week of stomach flu 🤢.
Here’s a quick breakdown:
✅ Deck + Frame assembly – Straightforward and came together surprisingly well. Seeing the structure take shape was a huge motivator! Getting the angles right was a bit tough but having a digital angle reader was a game changer.
✅ Transforming Door Installation – Tricky, but manageable. The opening door feature is awesome for ventilation, and I was excited about it from the start.
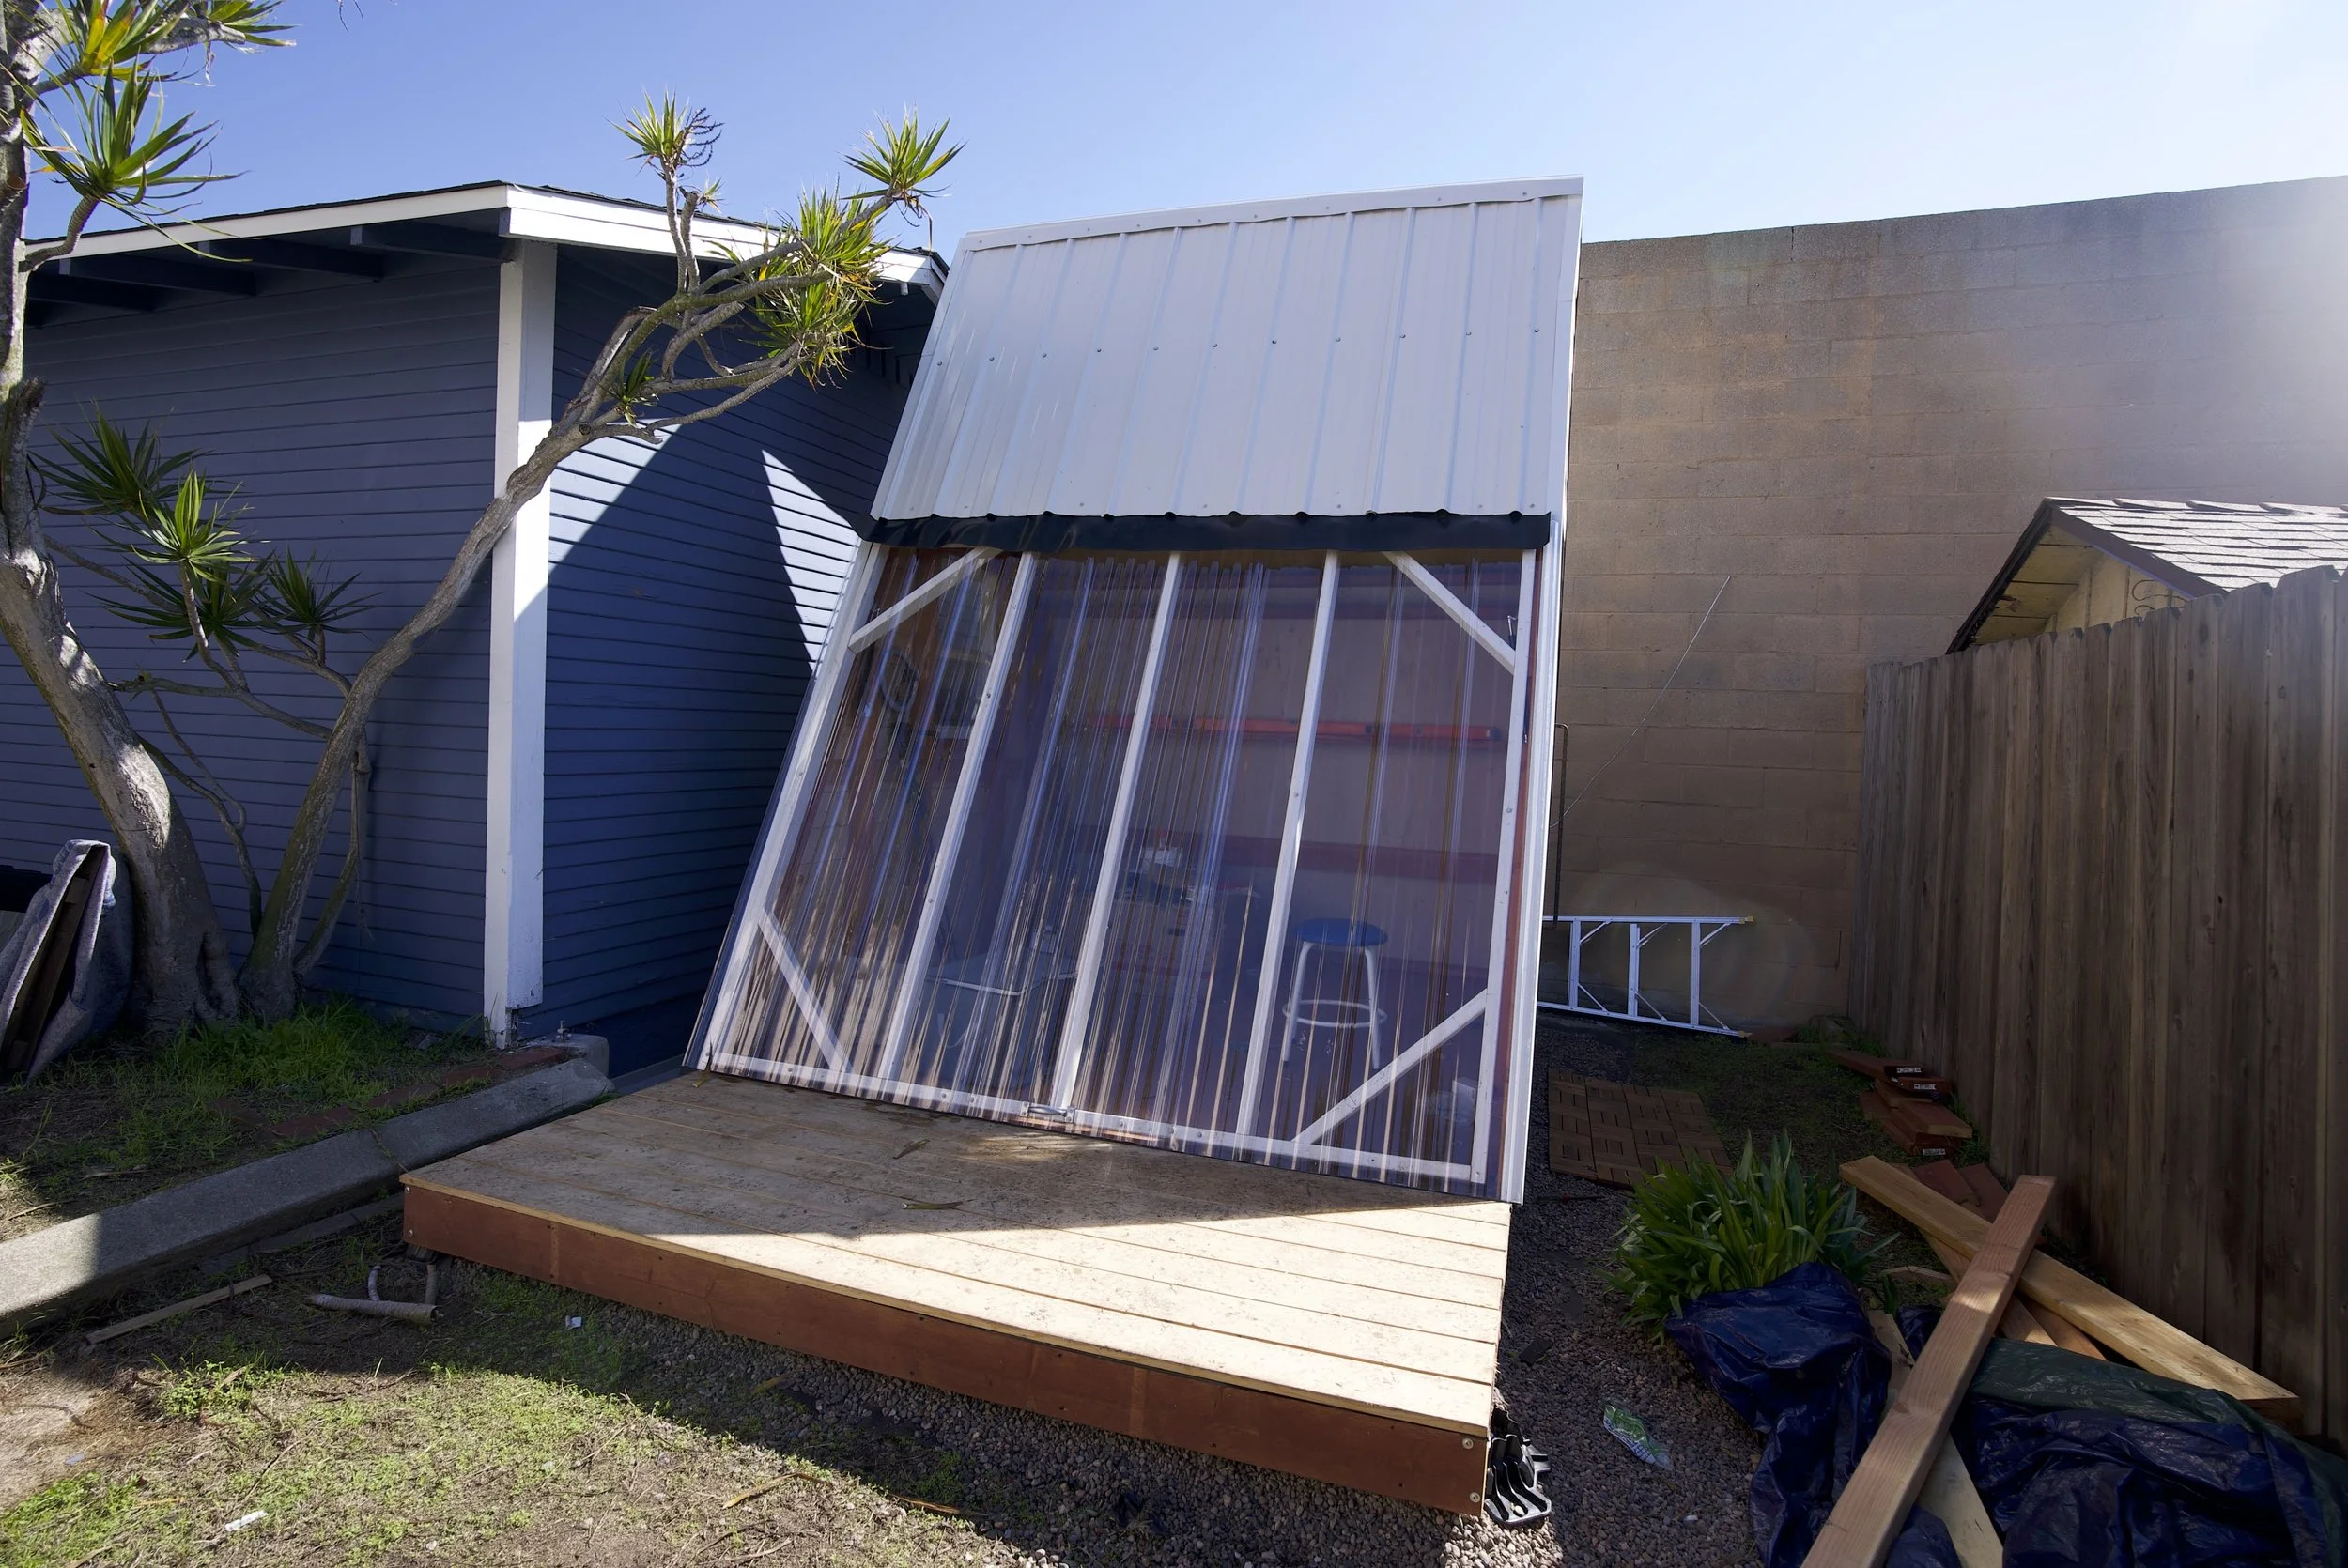
❌ The hinge method for the door – More on this in the next section, but let’s just say this part did NOT go as planned.
❌ Metal roofing mishaps – Cutting metal is loud and messy and putting it on is a doozy.
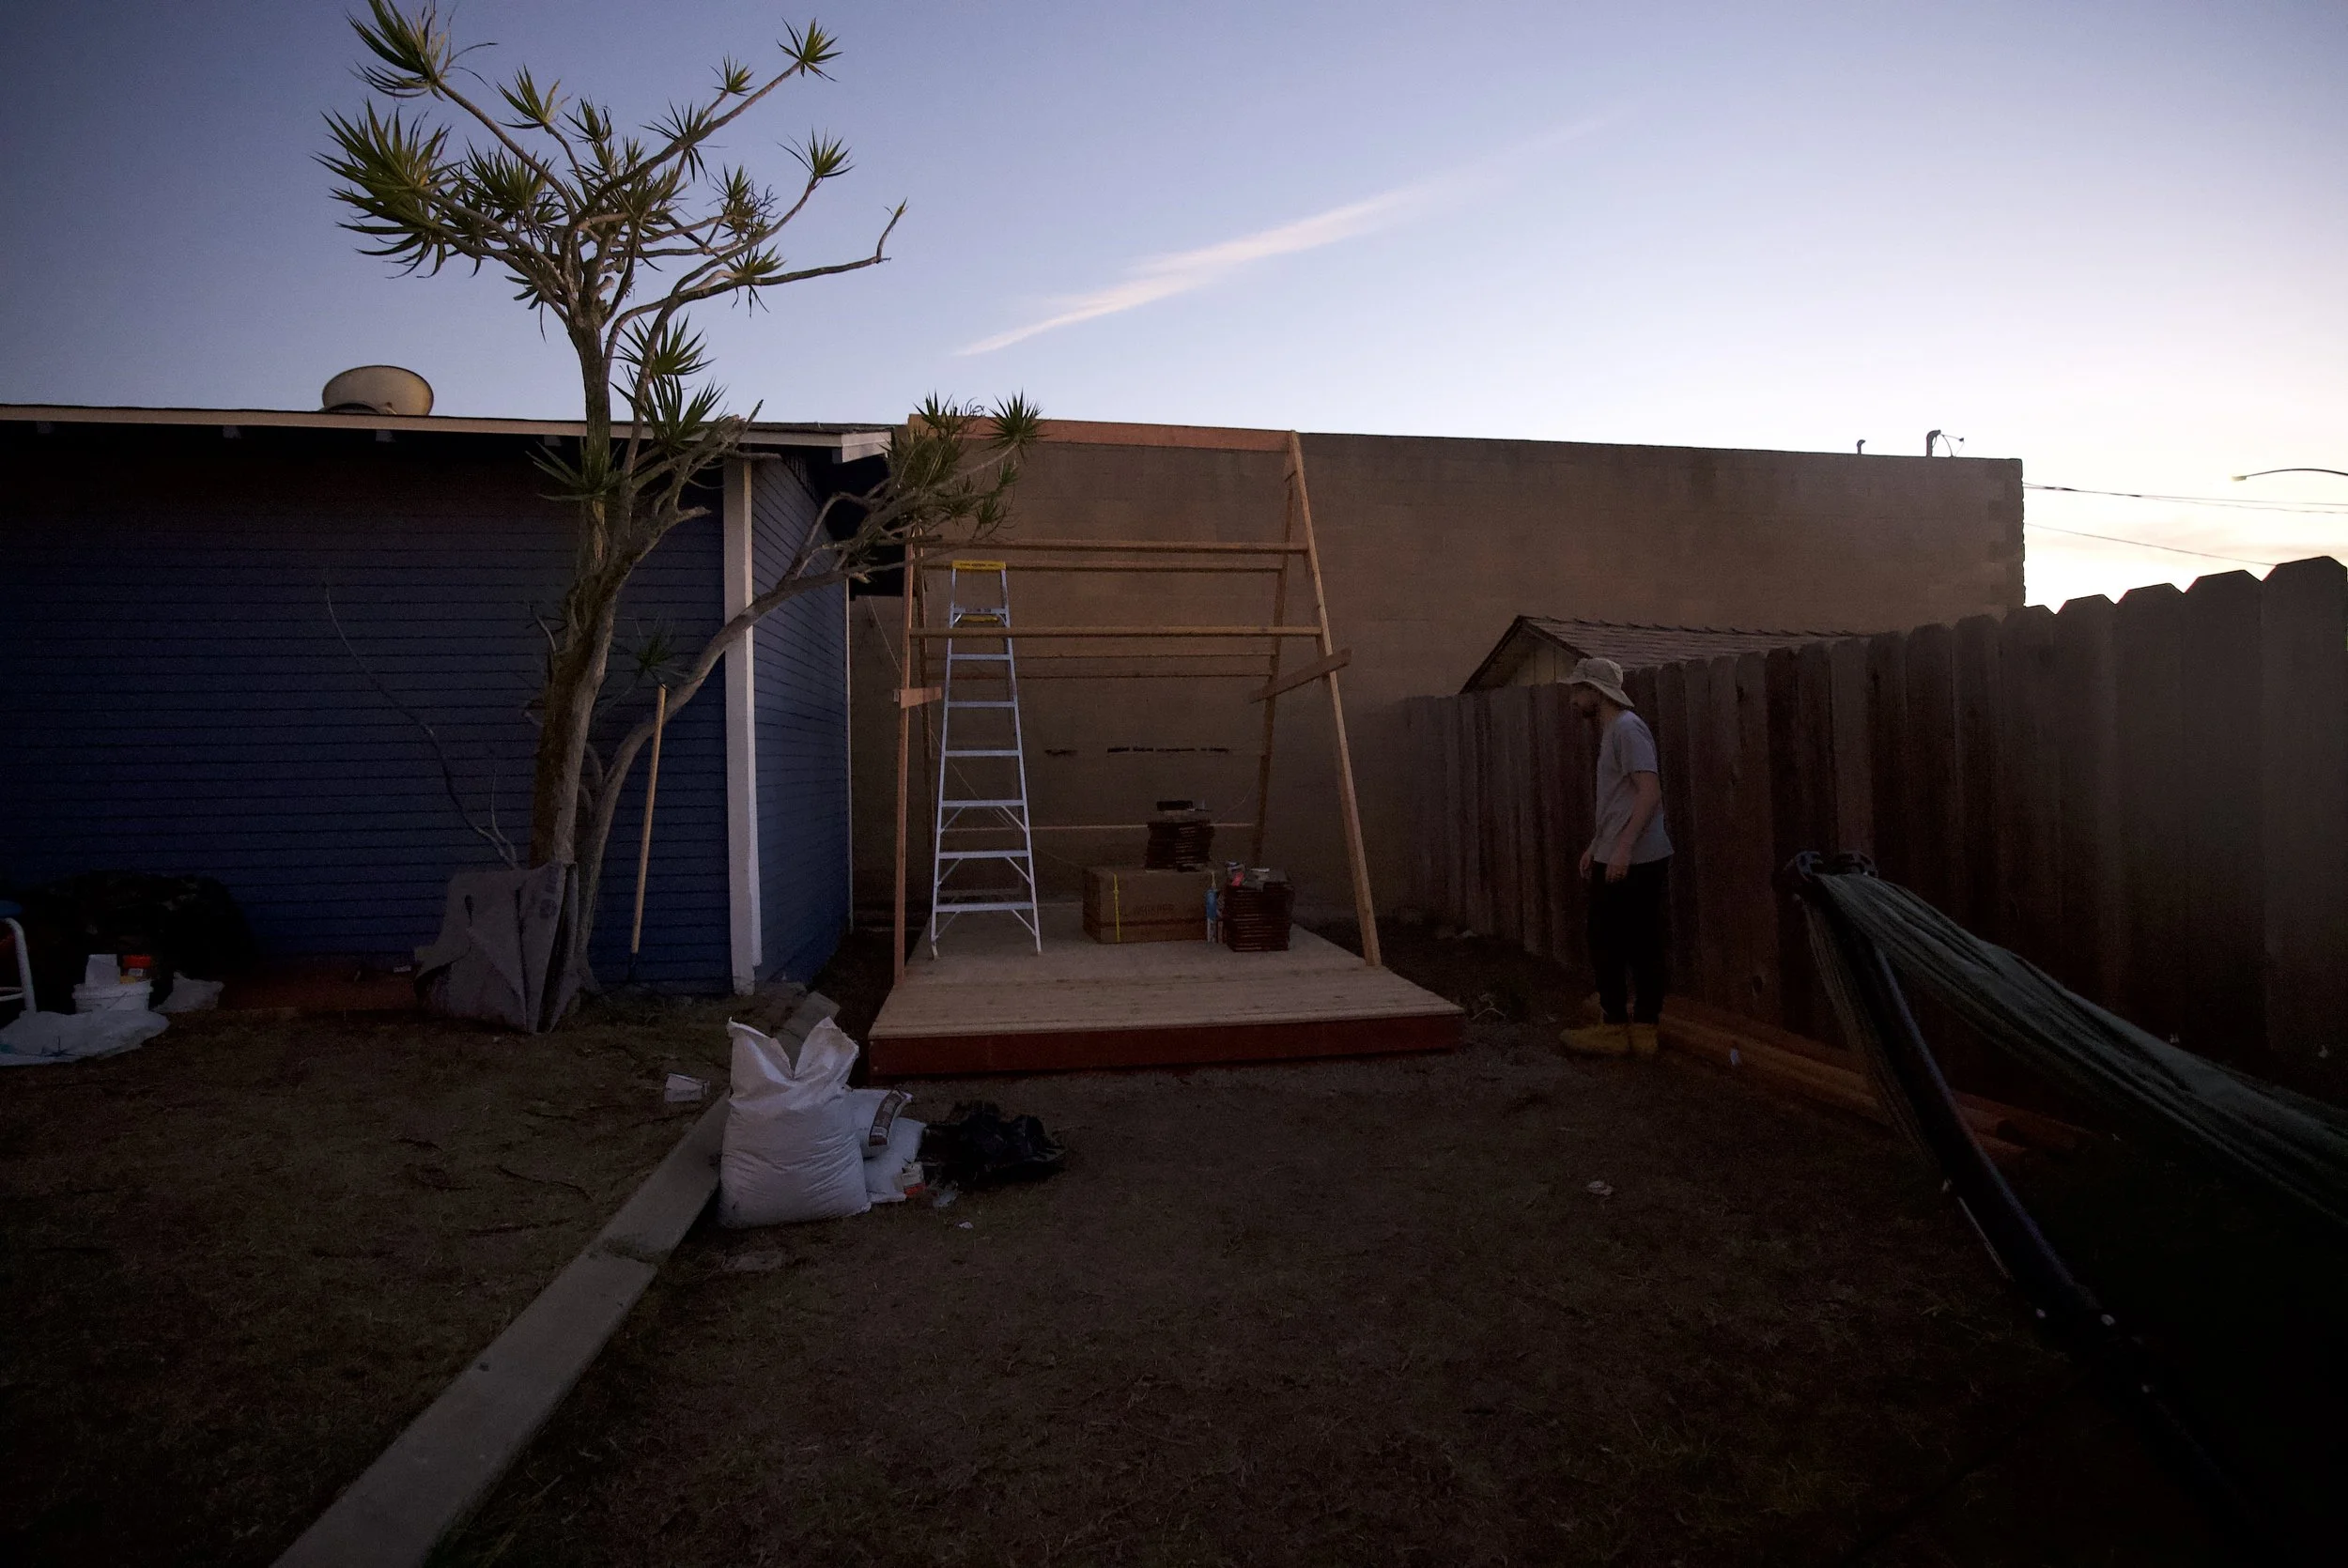
Day one of framing
We had about 4 hours, which was enough to set up the sidewalls, main beam and purlins .
What I Loved About the Process
Building this studio was not just about the end result; the journey itself was incredibly fulfilling.
What I loved during the process:
Deck Construction: Crafting the deck was surprisingly smooth. The framing process was straightforward, and seeing the base take shape was immensely satisfying. Plus, after the deck is done, I was too far gone on the cost of wood to go back.
Cedar Decking with the CAMO Tool: Installing the cedar decking was a breeze, thanks to the CAMO Marksman Pro tool. Usually I refuse to buy a tool that does only one *very* specific task but I really didn't want to see any screws. This handy device allowed for quick installation without visible screws, giving the deck a clean, professional look.
Learning and Growth: Each step, even the challenging ones, taught me something new. The hands-on experience deepened my appreciation for craftsmanship and DIY projects.

Roofing Ready
The structural plywood, L - shaped brackets + siding gave the structure a lot more stability. It felt less secure prior to this step.
What I Would Do Differently
If I could go back and redo one thing, it would definitely be the hinge method for the roof opening.
Originally, I was given the option to use a hinge or a lag bolt. I thought a hinge would be more straight forward but adding parts invited more potential points of failure.
This ended up being more complicated than necessary because:
The metal roofing was over the hinge by an inch, making it difficult to access when adjustments were needed. This was a silly oversight on my part and I easily could have cut the metal shorter before putting it on had I noticed.
The screws came loose at the top of the hinge, potentially from the pressure of the gas struts on that part of the door, meaning I had to remove the metal roofing just to install longer screws and fix it (which was a headache).
Overall, it felt way more finicky than it should have been.
Instead, I would use lag bolts next time. They’re simple, strong, and eliminate the need to mess with hinges that could potentially fail later. Lesson learned!

Loose Hinge, Broken Door
The hinge came loose and the entire door shifted to one side. I I ever do this again, I’ll use lag bolts.
Final Thoughts & What’s Next
Despite the hiccups, this project has been incredibly rewarding. Every time I step into my little A-frame studio, I feel a sense of pride—this is a space that I’ve built with my own two hands.
Now it's time to actually make it a pottery studio and add some finishing touches to it. 😉
Coming up next: A deep dive into the actual cost breakdown of this project—how much I spent on materials, what was worth splurging on, and where I managed to save. Stay tuned!
I’ll edit this post with a link to my YouTube video of the process so you can see it live once it’s posted.
If you’re thinking about building your own creative space, I’d love to hear about it! Drop a comment and share your dream studio ideas. Let’s inspire each other! 😊